The System Management Administrator (SMA) Console is a web-based administrative interface in IBM Sterling Order Management System. It is primarily used for managing system properties and runtime configurations that control the behavior of OMS.
Key Features:
- View and modify system properties stored in the database.
- Apply property overrides without restarting the application.
- Manage environment-specific configurations.
- Perform advanced searches for properties.
- Server Dashboard.
- Start and stop traces.
Importance :
- Centralized Control: SMA provides a single interface to manage OMS configurations.
- Dynamic Changes: Allows property changes without redeploying or restarting OMS, reducing downtime.
- Environment Management: Useful for managing Dev, QA, Prod environments with different settings.
- Troubleshooting: Helps quickly adjust configurations during performance tuning or issue resolution.
Launch sma :
- Build and deploy the sma.war
- SMA port : https://<server>:<port>/sma/sma/login.do
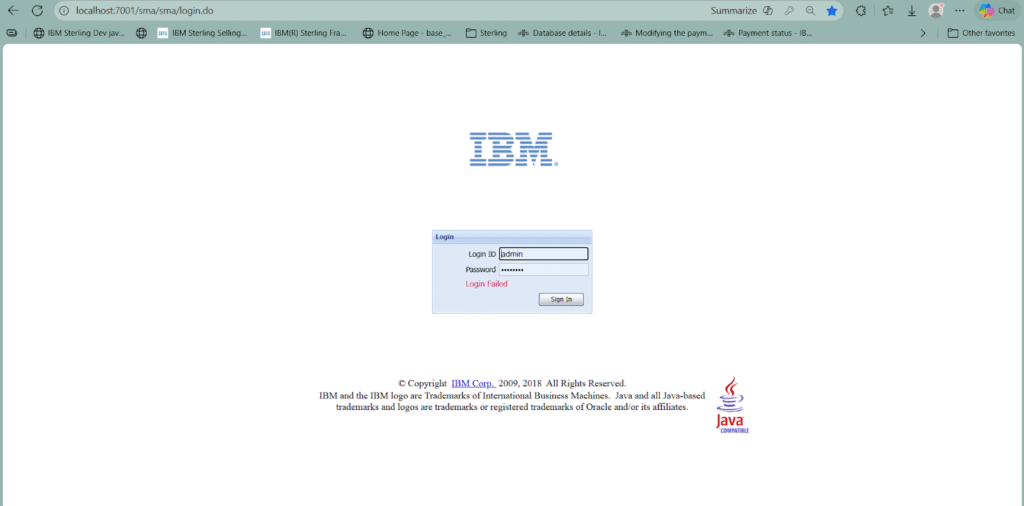
- Login
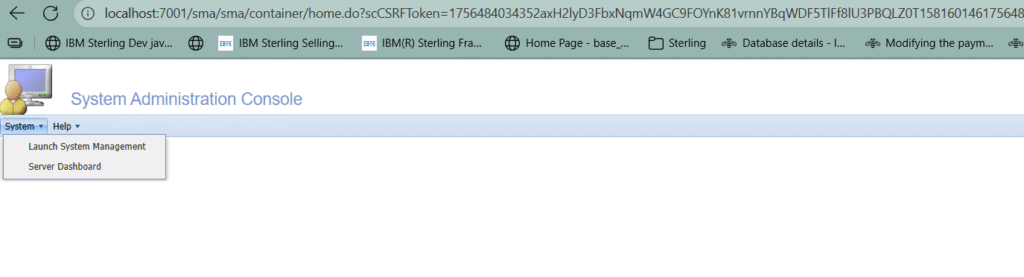
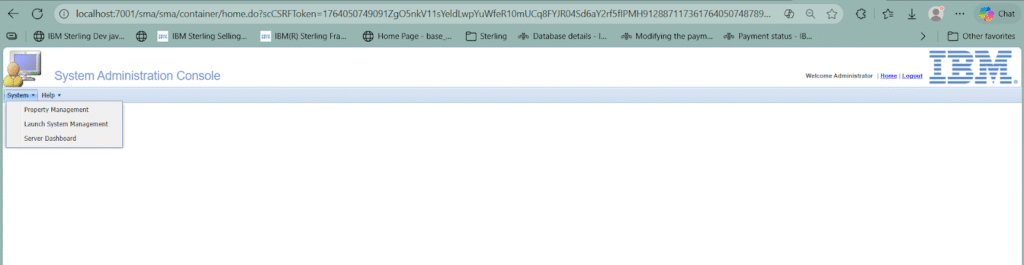
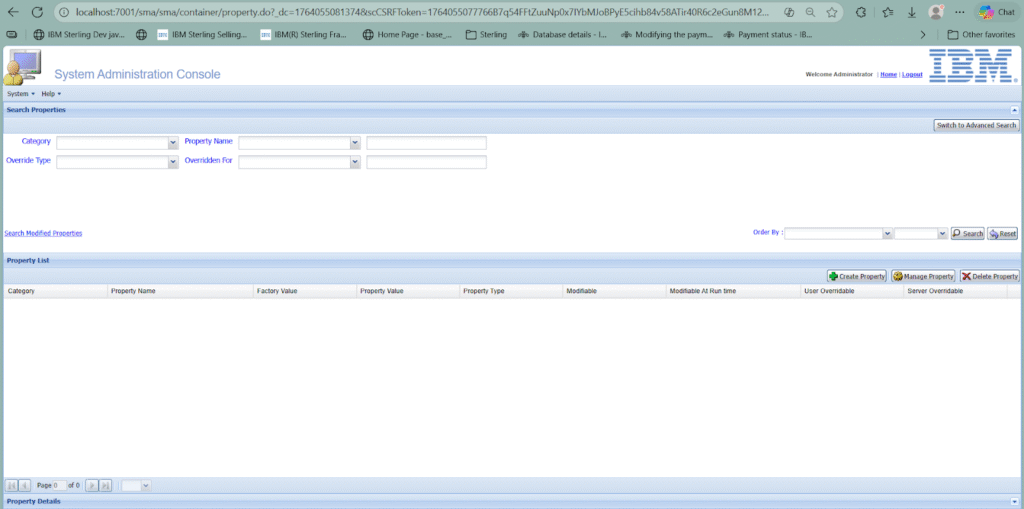
- To create new property, Go to system > Property management
- if Property management is not present follow the below steps
Step 1: Enable the property DATABASE_PROPERTY_MANAGEMENT=true in the sandbox.cfg file.
Step 2: Run the loadproperties.cmd script located at <INSTALL_DIR>/runtime/bin. This script loads properties into the database and generates the necessary files under runtime/properties.
Step 3: Rebuild the EAR file and redeploy the application.
After completing the above steps, the Property Management option will be appearing in the dropdown menu as shown below.
1. Property Management
Purpose:
- This is the core feature of SMA. It allows administrators to view, search, and modify system properties that control OMS behavior.
Key Functions:
- Search Properties: Basic or advanced search by property name, category, or description.
- Modify Properties: Change values and apply overrides dynamically.
- Add/Delete Properties: Create custom properties or remove unused ones.
- Export/Import: Move property configurations between environments.
- Properties stores in the plt_property table.
System > Property Management
Select create property
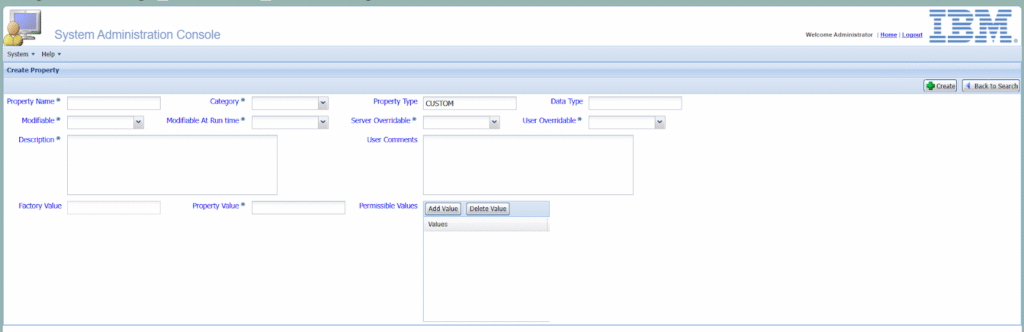
Give the required values
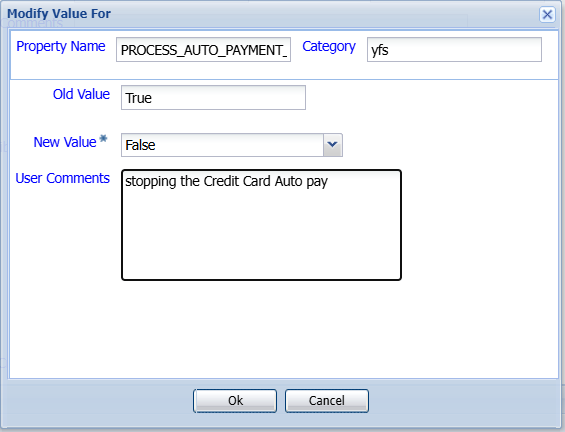
Here creating a property for PROCESS_AUTO_PAYMENT_FOR_CC_ORDERS
Scenario : Done one development for Automatically processing the payments for the Credit card orders. Need one property to decide whether to process the auto pay or not. If it set false we no need to process it, or it is true to process the auto pay.
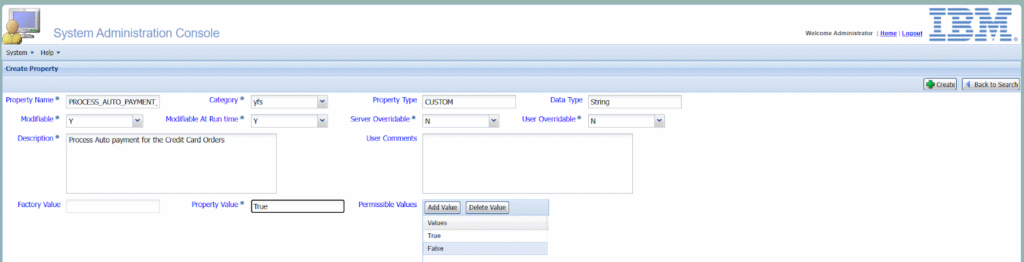
Here have provided the true and false as permissible values. When we need to change this property these values will be shown in the drop down.
To save this select the create
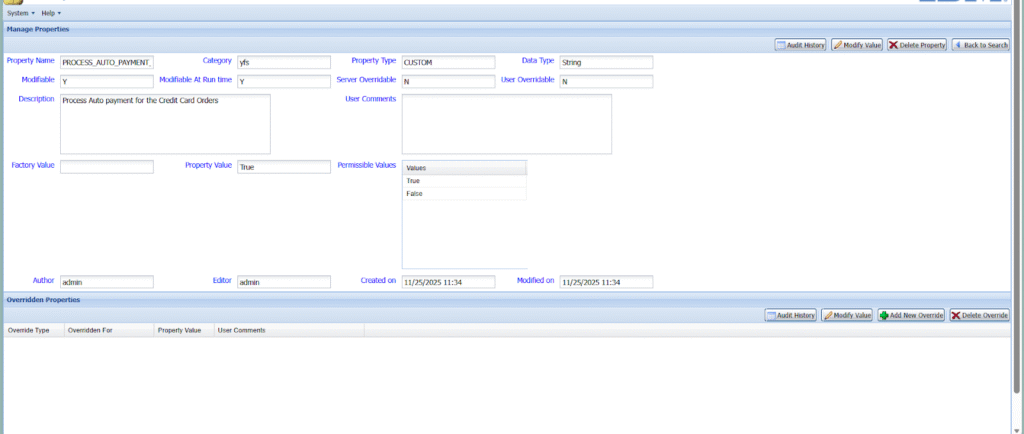
To change the value select Modify value
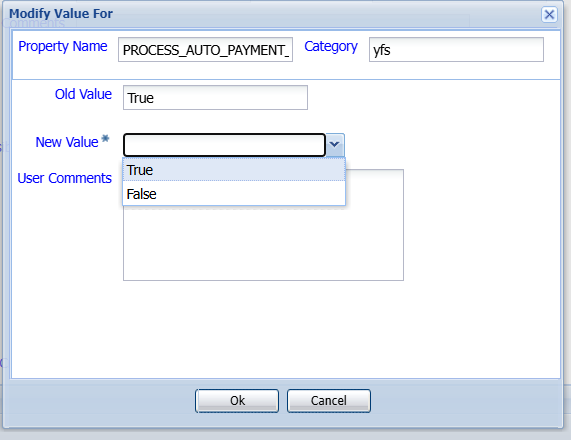
Select the new value in the drop down and give user comments
Ok
Now check the Property in the plt_property table

How to fetch the properties in java code ?
YFSSystem.getProperty(“PROCESS_AUTO_PAYMENT_FOR_CC_ORDERS”);

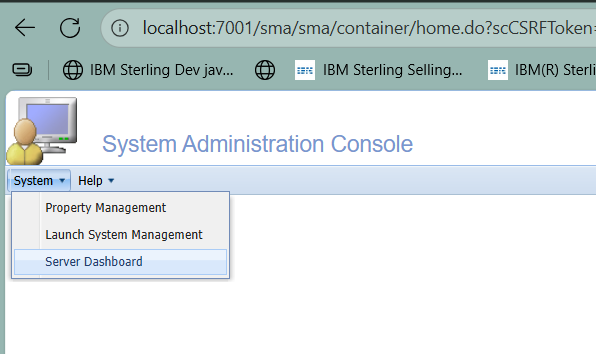
- Server Dashboard
Purpose:
This section provides a real-time view of OMS servers and their health.
Steps to Use:
- Login to SMA → Navigate to System → Server Dashboard.
- View Server Status:
- Displays all OMS servers (Application, Agent, Integration).
- Shows Up/Down status, JVM memory usage, CPU load.
- Monitor Performance:
- Check heap memory, thread count, and GC stats.
- Identify servers under stress or nearing capacity.
4. Actions:
- Refresh dashboard for latest metrics.
- Drill down into a specific server for detailed stats.
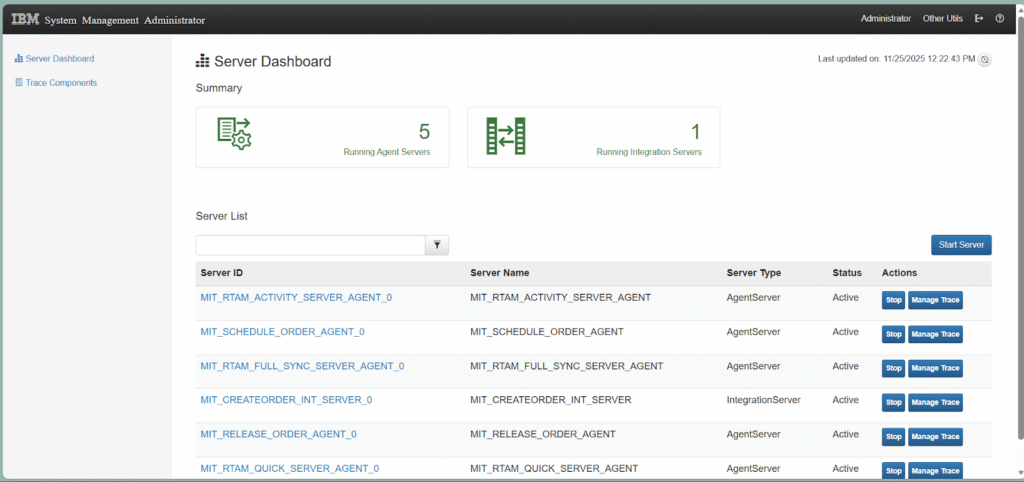
5 . Agent server and 1 integration server is running currently
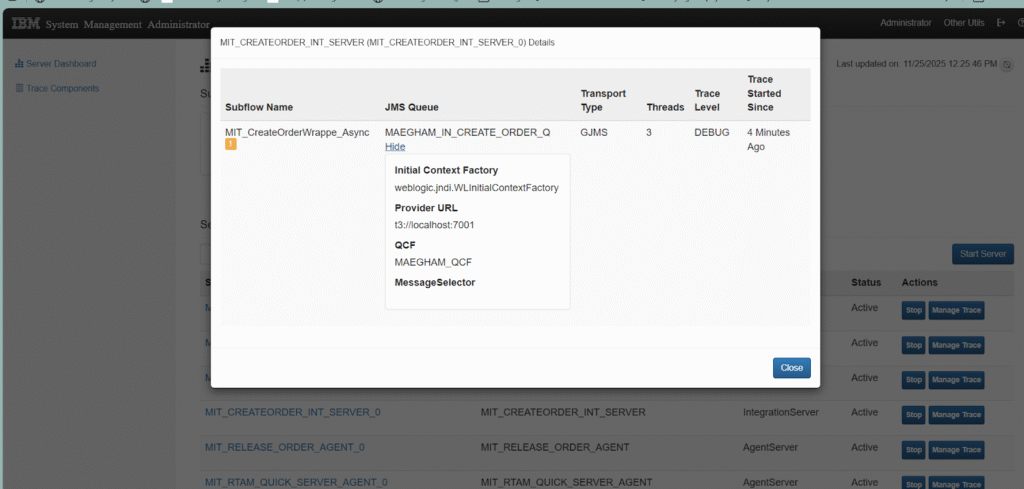
We can able to see the server detail by select the server id
Under the actions by clicking the STOP button we can stop the server.
Here click the stop for MIT_RELEASE_ORDER_AGENT server
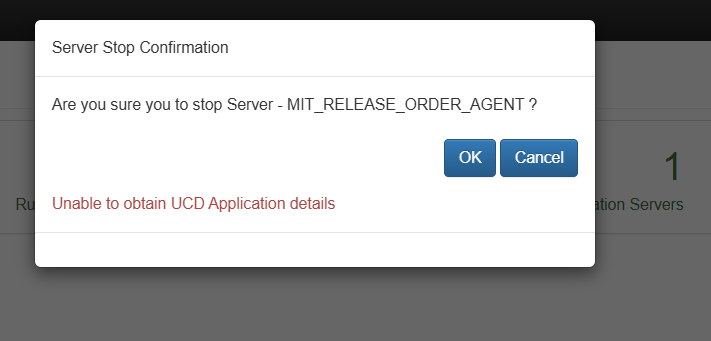
Click Ok

Status stop in progress
Then Manage trace for Agent, select manage trace for any agent
select the trace level and start
by click the stop button we can able to stop this trace
- Trace Components
Purpose:
Used for diagnostic tracing of OMS components to troubleshoot issues.
Steps to Use:
- Navigate to Trace Components:
- From the Server Dashboard, click Trace Components.
- Select Component:
- Choose an OMS component (e.g., API, Agent, Integration).
- Enable Trace:
- Set trace level (INFO, DEBUG, ERROR).
- Apply trace for a specific duration or until manually stopped.
- View Logs:
- Trace output is captured in OMS logs for analysis.
- Helps debug API failures, performance issues, or integration errors.
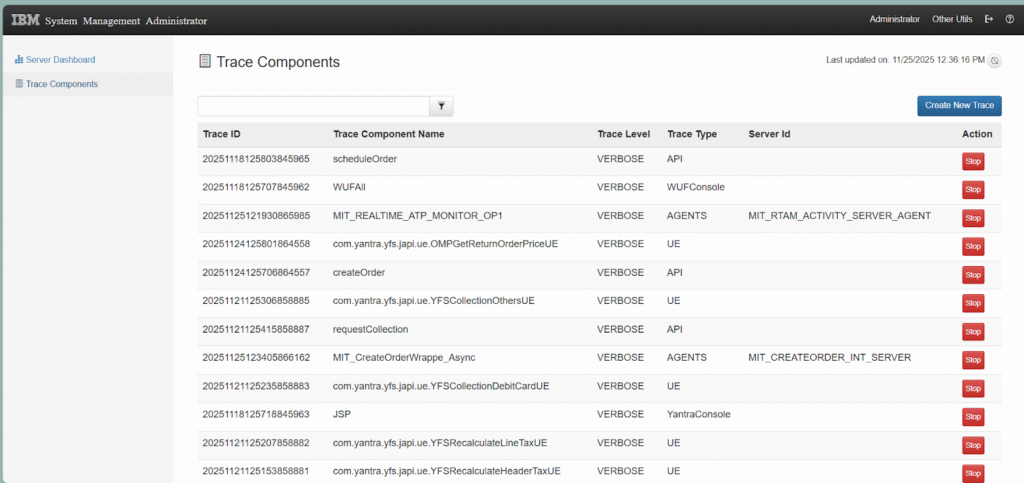
The trace components page will show all the traces enabled. We are able to stop the trace by the stop button.
To create a new trace select the Create New Trace button.
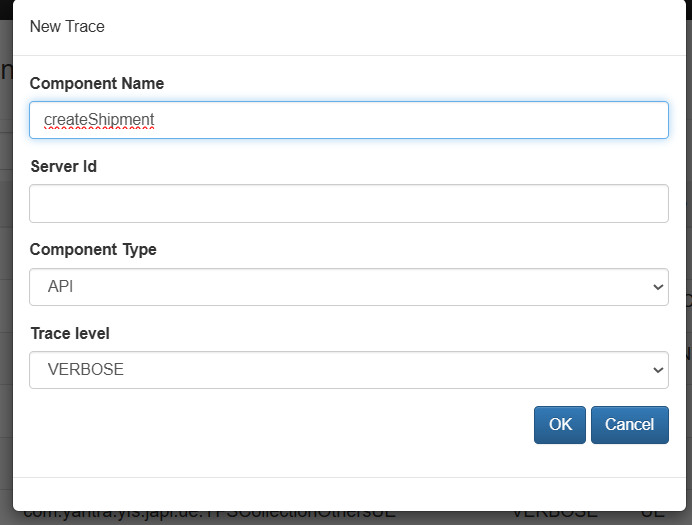
Ok

“Got queries? Comment below and let’s clear them up together!”